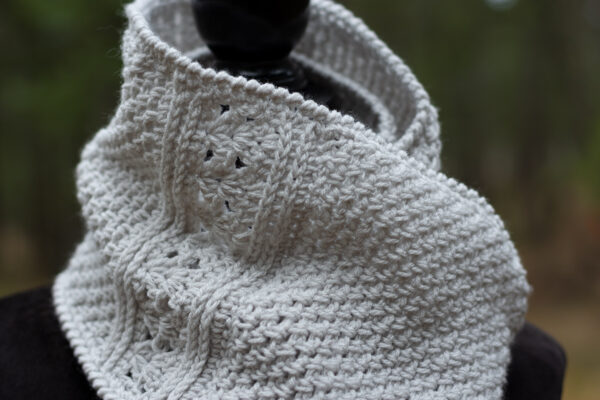
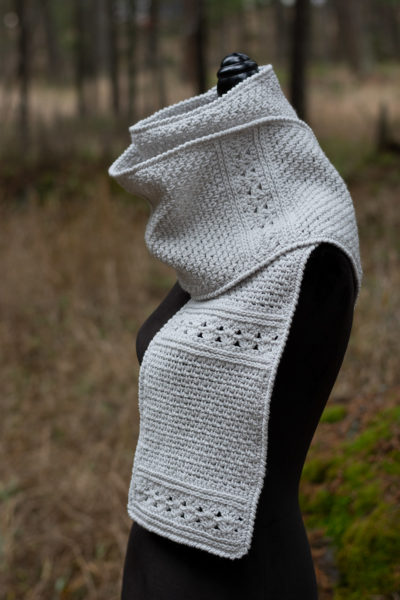
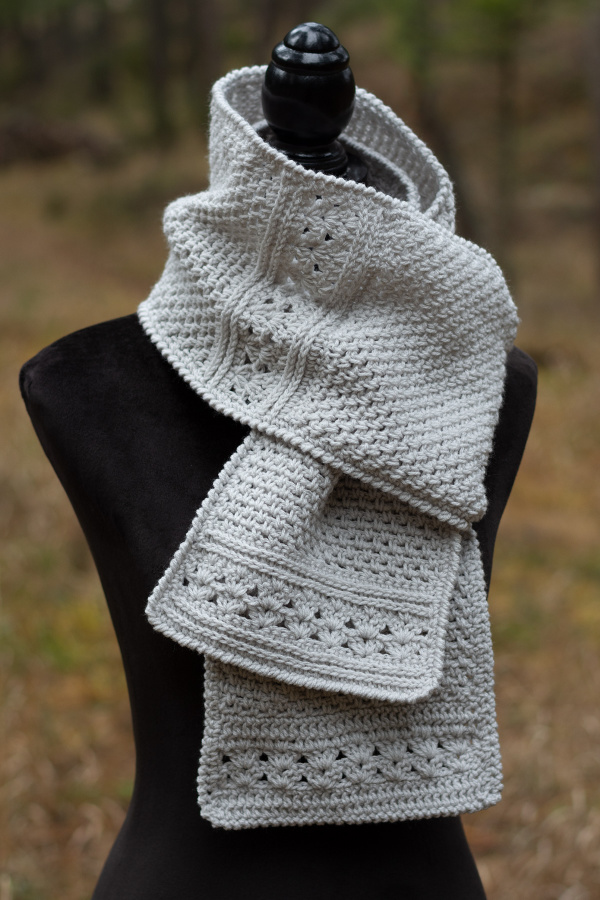
Sometimes simplicity and a little texture creates stunning crochet pieces. This soft, elegant Misty Hollow Scarf comes in 4 widths for those who like skinny scarves to those who love them wide.
Get the Misty Hollow Scarf Pattern
You get access to all Four sizes when purchasing the complete PDF from my online shops below:
Sign up to receive exclusive pattern releases, step-by-step instructions, and helpful tips to guide you through this fun and engaging crochet-along! Click here to join!

I would love to see your projects in my Facebook Group and/or on Instagram!

Who says simple has to be boring? This Misty Hollow Scarf is easy to stitch up while looking breath taking and chic. It’s combined with simple stitches and a few new techniques to create this upscale designer look that you will love crocheting for yourself, as well as your friends! Be sure to yell if you need help. I am here to guide you along the way.
You can find more of my crochet scarves over HERE

This scarf is part of a joint effort between Kirsten Holloway Designs and myself to design a series of crochet items that you can pick and choose to create the perfect Fall collection or holiday gift. Can you see your daughter or friend wearing this collection to church, work, or a holiday event? Be sure to keep a look out for other accessories, coming soon! This scarf will always be available to follow on my site. Enjoy!
Disclaimer: This post contains affiliate links. When you purchase something through these links I earn a small commission. You do not pay any extra for the item you purchase.
MISTY HOLLOW SCARF
REQUIREMENTS
Level of Difficulty
- Beginner/Intermediate
Yarn
- 430, 560, 715, 850 yards. #3 light weight Bernat Baby Sport in Baby Grey (all yardages are based on 72” scarf)
Hook and Notions
- Size Hook: H(5mm) & I/9 (5.5 mm), scissors, blunt needle and stitch markers (optional)
Measurement
- 6 (8, 10, 12) inches wide
- 6 (7 ½, 9) foot long
Gauge
Scarf: 16 sc = 4 inches
10 rows of granite stitch = 2” of height
Abbreviations
- Sc = single crochet
- Ch = chain
- Sl St = slip stitch
- Hdc = half double crochet
- Dc = double crochet
- Rsc = reverse single crochet
- St(s) = stitch(s)
- Sp(s) = space(s)
- Sk = skip
- Prev = previous
- Hdc in 3rd loop
Pattern Notes
- Weigh your yarn cake: ________ grams
- Worked from side to side
- 430, 560, 715, 850 yards. I used #3 light weight Bernat Baby Sport in Baby Grey (all yardages are based on 72” scarf)
- Because I am a tight crocheter I used the I crochet hook to chain with, so the chain isn’t too tight. This will also keep it from buckling. If you crochet loosely then you really shouldn’t have to go up a hook size when chaining. Rule of thumb always check your gauge.
- Chain 1 at beginning of row only counts as a stitch in the granite stitch section
- This scarf is made in 4 different widths. Image is displaying a 8” scarf that is 72” long.
Special Stitches
- Hdc in 3rd Loop = With the front of the stitch facing you, look at the top of the stitch, and find the sideways “V”. Next, bend the stitch to look at the back, and you should see another “V”. You’ll be working into the back loop of that “V”, this is called the 3rd loop. When working across, like you are in the scarf the 3rd loop should be facing you.
- Split Shell:
Gauge: 2 rows = 1” of height
Row 1: Ch 3 (counts as first dc), sk 2 sts, *4 dc in next st, sk 3 sts; repeat from * across, dc in last st. Turn
Row 2: Ch 3 (counts as first dc), sk 2 sts, 4 dc in middle of prev shell, *sk 4 sts, 4 dc in middle of prev shell; repeat from * across, sk 2 sts, dc in last st. Turn - Granite Stitch (AKA- Linen Stitch, Moss Stitch):
Gauge: 5 rows = 1” of height
Row 1: Ch 1, sc in first st, *ch 1, sk st, sc in next st; repeat from * across. Turn
Row 2: Ch 1, *sk sc, sc in ch-1 sp, ch 1; repeat from * across, sc in turning ch of prev row. Turn
MISTY HOLLOW SCARF INSTRUCTIONS
8” scarf by 72” long
Working with I hook,
Make Two Panels
Ch 48,
Working with H hook
Row 1 (RS): hdc in 2nd chain from hook and in each chain across. Turn. (47 hdc)
Fasten off.
With right side facing, attach yarn into 3rd loop of hdc at the opposite end of row.
Row 2 (RS): working in 3rd loop of hdc on prev row, hdc in each st across. Turn. (47 hdc)
Row 3 (WS): Ch 1, working in 3rd loop of hdc on prev row, sc in each st across. Turn. (47 sts)
Row 4: Ch 3 (counts as first dc), sk 2 sts, *4 dc in next st, sk 3 sts; repeat from * across, dc in last st. Turn. (11 shells, 2 dc)
Row 5: Ch 3 (counts as first dc), sk 2 sts, 4 dc in middle of prev shell, *sk 4 sts, 4 dc in middle of prev shell; repeat from * across, sk 2 sts, dc in last st. Turn. (11 shells, 2 dc)
Row 6: Ch 1, hdc in same st, hdc in first st of shell, sk st, 2 hdc in middle of prev shell, sk st, hdc in next st, *hdc in next st, sk st, 2 hdc in middle of prev shell, sk st; repeat from * across, hdc in last st. Turn. (46 hdc)
Fasten off.
With right side facing, attach yarn into 3rd loop of hdc at the opposite end of row.
Row 7 (RS): working in 3rd loop of hdc, hdc in east st across. Turn. (46 hdc)
Row 8: Ch 1, working in 3rd loop of hdc, sc in next 22 sts, 2 sc in next st, sc in next 23 sts. Turn. (47 sc)
Now you will start the granite stitch section. Be sure to keep your tension relaxed across this section otherwise your stitches will start to pull in the sides. Feel free to go up a hook size if needed.
Row 9 (RS): Ch 1, sc in first st, *ch 1, sk st, sc in next st; repeat from * across. Turn. (47 sc)
Row 10: Ch 1, *sk sc, sc in ch-1 sp, ch 1; repeat from * across, sc in turning ch of prev row. Turn. (48 sts)
My gauge was roughly 4 rows in 1” of height.
Repeat Row 10:
18 times or until that section measures 4 ½”
I recommend you write this number down so you have it for future reference. You will repeat this section in the future, and I am sure you will like the results better if each section is even. 😊
At this point your scarf should measure roughly 8 ½” from Row 1 to where you stopped. It is important that you end the granite stitch on a row where the (WS) is facing you. Make sure the next row is (RS) facing you when you begin working.
Row 11 (RS): Ch 1, hdc in each st across do *not* work into turning ch at end of row.
Fasten off and weave in ends.
Repeat Rows 2-11, (3 more times for a 6 ft scarf)
On the last set of Panel One you will repeat Row 10 a total of 40 times.
Joining:
Both panels should be facing RS and shells facing upward. Be sure both panels are facing the same direction. Join both panels together at the sc row and granite stitch row.
Edging:
You will evenly sc along both sides of the scarf. Please note you will not be working a sc along the ends. Once you have evenly sc along one side of the panel, fasten off. Now you will evenly sc along the other side of the scarf. Do Not Fasten Off.
Now you will work the crab stitch along both sides and ends. You may wish to go down a hook size when working the crab stitch to make the edging look neater.
Get the Misty Hollow Scarf Pattern
You get access to all Four sizes when purchasing the complete PDF from my online shops below:
Don’t forget to share your projects in my Facebook Group and/or on Instagram!
Sign up to receive exclusive pattern releases, step-by-step instructions, and helpful tips to guide you through this fun and engaging crochet-along! Click here to join!
Happy Hookin!
XO, Mistie

