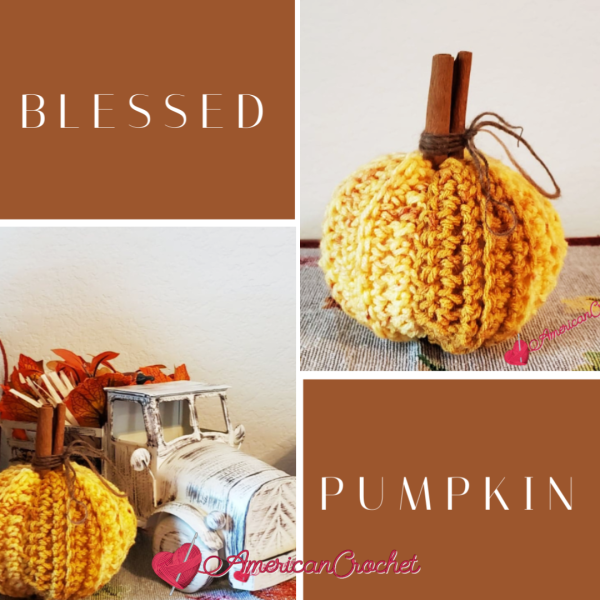
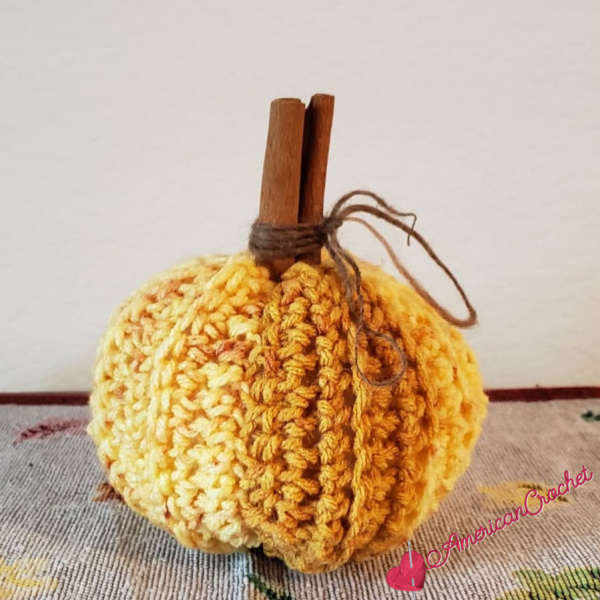
Are you looking for a quick and festive crochet project for both Halloween and Fall? The Blessed Pumpkin is the perfect choice! Designed for the Halloween Crochet Along 2019, this fun and advanced-stitch pumpkin can be crocheted in just an hour using worsted weight yarn. Whether you’re decorating your home for Halloween or sprucing up your space with a cozy Fall vibe, the Blessed Pumpkin adds a seasonal touch to any room.
Sign up for my newsletter to receive updates on new patterns, exclusive discounts, and crochet tips! Click here to join!
Purchase this pattern directly from my shop! Coming soon!
Blessed Pumpkin Instructions
Chain 16 Row 1 (working in back bump): hdc in 2nd chain from hook and in chain across. Turn (15 hdc)
Rows 2-28: Chain 1 (See Notes), blo sc in same stitch, blo exsc in each hdc across, blo sc in last hdc.
Turn (2 blo sc, 13 blo exsc) Fasten off, leaving long enough tail for sewing
Assembly Using the tail, mattress stitch the edge of the first and last rows together and fasten off. Now you have a cylinder shape. Next, using another piece of yarn, weave in and out across the top gaping created by each row around the cylinder. Pull ends tight to close the end and tie off. Now you need to stuff firmly with fiber fill. If you want your pumpkin to be tall and plush add more fiber fill. If you want your pumpkin to be shorter and wider, then just use less fiber fill. Once you have stuffed your pumpkin to your liking, take another strand of yarn and weave in and out around the top of the pumpkin, closing tight and tying off as you did with the bottom. Be sure to leave a bit of a hole at the top for the stem later. Once you have tidied up all your ends, you can add the cinnamon sticks.
I put three sticks together and tied a rope or raffia around them.
I’d love to see your version of the Blessed Pumpkin!
Tag me on Instagram @americancrochet and use the hashtag #BlessedPumpkinCAL to share your work with the crochet community!
You can also join our Facebook group to post photos, share tips, and connect with other crocheters working on the same project.
Sign up for my newsletter to receive updates on new patterns, exclusive discounts, and crochet tips! Click here to join!
Happy Hookin! XO, Mistie
Pin Me for Later!

Disclaimer: This post contains affiliate links. When you purchase something through these links I earn a small commission. You do not pay any extra for the item you purchase.
BLESSED PUMPKIN
REQUIREMENTS
Level of Difficulty
- Beginner/Intermediate
Yarn
- 30 yards of #4 Worsted yarn
Hook and Notions
- Size Hook: I (5.5 mm)
- Scissors
- Stitch markers
- Blunt needle
- Cinnamon Sticks (Optional)
- Fiber Fill
- Raffia (Optional)
Measurement
- 4 ½ inches tall (without stem) and 16 inches around
Gauge
- Not important for this project
Abbreviations
- Ch/chs = chain/chains
- Hdc = half double crochet
- BLO = back loop only
- Exsc = extended single crochet
- Sp(s) = space(s)
- Sl St = slip stitch
Pumpkin Pattern Notes
- Weigh your yarn cake: ________grams
- Worked in the round
- Chain 1 at beginning of round does not counts unless otherwise stated.
- I used #4 worsted weight Sweet Roll premier yarn in Butterscotch Pop
- CLICK HERE FOR THE FULL DETAILS REGARDING the Halloween Crochet Along 2019
Special Stitches
- Extended Single Crochet (Exsc): Pull up a loop in indicated stitch, yarn over and draw through one loop on hook, yarn over and draw through remaining two loop on hook.

Video Tutorials if available will be on my YouTube Channel – Subscribe to my YouTube Channel!
Purchase this pattern directly from my shop! Coming soon!
Blessed Pumpkin Instructions
Chain 16 Row 1 (working in back bump): hdc in 2nd chain from hook and in chain across. Turn (15 hdc)
Rows 2-28: Chain 1 (See Notes), blo sc in same stitch, blo exsc in each hdc across, blo sc in last hdc.
Turn (2 blo sc, 13 blo exsc) Fasten off, leaving long enough tail for sewing
Assembly Using the tail, mattress stitch the edge of the first and last rows together and fasten off. Now you have a cylinder shape. Next, using another piece of yarn, weave in and out across the top gaping created by each row around the cylinder. Pull ends tight to close the end and tie off. Now you need to stuff firmly with fiber fill. If you want your pumpkin to be tall and plush add more fiber fill. If you want your pumpkin to be shorter and wider, then just use less fiber fill. Once you have stuffed your pumpkin to your liking, take another strand of yarn and weave in and out around the top of the pumpkin, closing tight and tying off as you did with the bottom. Be sure to leave a bit of a hole at the top for the stem later. Once you have tidied up all your ends, you can add the cinnamon sticks.
I put three sticks together and tied a rope or raffia around them.
I’d love to see your version of the Blessed Pumpkin!
Tag me on Instagram @americancrochet and use the hashtag #BlessedPumpkinCAL to share your work with the crochet community!
You can also join our Facebook group to post photos, share tips, and connect with other crocheters working on the same project.
Sign up for my newsletter to receive updates on new patterns, exclusive discounts, and crochet tips! Click here to join!
Happy Hookin! XO, Mistie
Pin Me for Later!


The Blessed Pumpkin is not just a Halloween project – it’s perfect for the entire Fall season! Whether it’s part of your Thanksgiving table decor or a cozy living room accessory, this crochet pumpkin brings warmth and charm to any Fall display.
I would love to see your projects in my
Disclaimer: This post contains affiliate links. When you purchase something through these links I earn a small commission. You do not pay any extra for the item you purchase.
BLESSED PUMPKIN
REQUIREMENTS
Level of Difficulty
- Beginner/Intermediate
Yarn
- 30 yards of #4 Worsted yarn
Hook and Notions
- Size Hook: I (5.5 mm)
- Scissors
- Stitch markers
- Blunt needle
- Cinnamon Sticks (Optional)
- Fiber Fill
- Raffia (Optional)
Measurement
- 4 ½ inches tall (without stem) and 16 inches around
Gauge
- Not important for this project
Abbreviations
- Ch/chs = chain/chains
- Hdc = half double crochet
- BLO = back loop only
- Exsc = extended single crochet
- Sp(s) = space(s)
- Sl St = slip stitch
Pumpkin Pattern Notes
- Weigh your yarn cake: ________grams
- Worked in the round
- Chain 1 at beginning of round does not counts unless otherwise stated.
- I used #4 worsted weight Sweet Roll premier yarn in Butterscotch Pop
- CLICK HERE FOR THE FULL DETAILS REGARDING the Halloween Crochet Along 2019
Special Stitches
- Extended Single Crochet (Exsc): Pull up a loop in indicated stitch, yarn over and draw through one loop on hook, yarn over and draw through remaining two loop on hook.

Video Tutorials if available will be on my YouTube Channel – Subscribe to my YouTube Channel!
Purchase this pattern directly from my shop! Coming soon!
Blessed Pumpkin Instructions
Chain 16 Row 1 (working in back bump): hdc in 2nd chain from hook and in chain across. Turn (15 hdc)
Rows 2-28: Chain 1 (See Notes), blo sc in same stitch, blo exsc in each hdc across, blo sc in last hdc.
Turn (2 blo sc, 13 blo exsc) Fasten off, leaving long enough tail for sewing
Assembly Using the tail, mattress stitch the edge of the first and last rows together and fasten off. Now you have a cylinder shape. Next, using another piece of yarn, weave in and out across the top gaping created by each row around the cylinder. Pull ends tight to close the end and tie off. Now you need to stuff firmly with fiber fill. If you want your pumpkin to be tall and plush add more fiber fill. If you want your pumpkin to be shorter and wider, then just use less fiber fill. Once you have stuffed your pumpkin to your liking, take another strand of yarn and weave in and out around the top of the pumpkin, closing tight and tying off as you did with the bottom. Be sure to leave a bit of a hole at the top for the stem later. Once you have tidied up all your ends, you can add the cinnamon sticks.
I put three sticks together and tied a rope or raffia around them.
I’d love to see your version of the Blessed Pumpkin!
Tag me on Instagram @americancrochet and use the hashtag #BlessedPumpkinCAL to share your work with the crochet community!
You can also join our Facebook group to post photos, share tips, and connect with other crocheters working on the same project.
Sign up for my newsletter to receive updates on new patterns, exclusive discounts, and crochet tips! Click here to join!
Happy Hookin! XO, Mistie
Pin Me for Later!

This Lil Pumpkin is so cute an it will smell nice too!!!
Thank you!
I am going very late, I was in the hospital. For two weeks and then in a rehabilitation care center for two weeks and then I was at my daughters house. Now I just. Getting home today. I was having crocheting & internet withdrawal pains . My daughter lives an hour away from where I live, to go back there she knows where about where I store everything . Truth be told I was too tired and sore to want anything thing but sleep…
Hi Darlene,
I am so sorry to hear that. I hope you get well soon. The Blessed Pumpkin will be here waiting on you. <3
Have a great evening!
Mistie