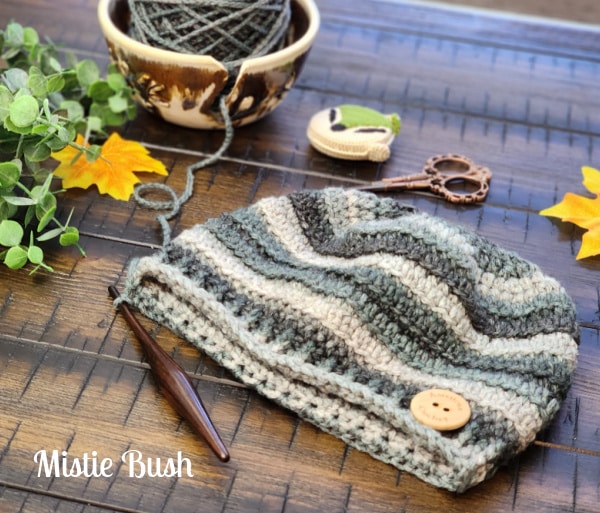
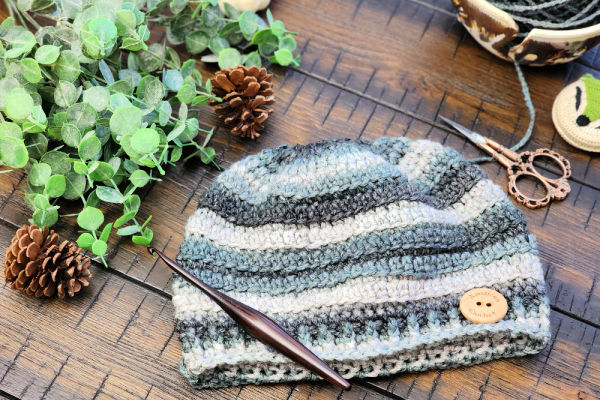
Meet The Loft Hat – an easy crochet hat pattern for men and women that’s both stylish and simple to make. This easy textured crochet beanie is designed for intermediate beginners who want to add a bit of texture to their work. With #4 yarn and a combination of extended single crochet and front and back post single crochet, this unisex beanie makes a cozy, handmade accessory that’s perfect for any wardrobe. It’s an ideal gift or a quick project for yourself to keep warm and stylish.
Get The Loft Hat Pattern
Grab the complete PDF to access all four sizes—perfect for creating hats for everyone on your list!
This beanie is worked up with soft #4 (medium) weight yarn, perfect for achieving a comfortable, stretchy fit that keeps its shape. The yarn offers just the right thickness to highlight the textured stitches, giving the hat a beautiful, defined look while staying warm and breathable. You can use wool for extra warmth or an acrylic blend for easy care – this yarn weight ensures that the beanie is lightweight yet warm, ideal for any season.
Disclaimer: This post contains affiliate links. When you purchase something through these links I earn a small commission. You do not pay any extra for the item you purchase.
Creating a gauge swatch helps ensure that your project will turn out with the intended size and fit. It’s also a great way to get comfortable with the stitches used in this pattern, allowing you to refine your technique for a polished finish.
Abbreviations
ch = chain
sc = single crochet
sl st = slip stitch
exsc = extended single crochet
FPsc = front post single crochet
BPsc = back post single crochet
BLO = back loop only
st(s) = stitch(s)
Beanie Pattern Notes
Weigh your yarn cake: ________ grams
Worked in the round from top down
This hat is made in 3 different sizes. Image is displaying a Small/Medium Adult Hat.
Special Stitches
exsc: Pull up a loop in indicated stitch, yarn over and draw through one loop on hook, yarn over and draw through remaining two loops on hook.
BLO: working in the back loop only of each stitch for the specified round.
With I hook Round 1: Ch 1, 12 dc in magic ring, join with sl st to first dc. (12) sts Round 2: (working in BLO) Ch 1, 2 sc in first st, *2 sc in next st; repeat from * around, join with sl st to first sc. (24) sts Round 3: Ch 1, 2 dc in first st, dc in next st, *2 dc in next st, dc in next st; repeat from * around, join with sl st to first dc. (36) sts Round 4: Ch 1, 2 sc in first st, sc in next 2 sts, *2 sc in next st, sc in next 2 sts; repeat from * around, join with sl st to first sc. (48) sts Round 5: Ch 1, 2 hdc in first st, hdc in next 3 sts, *2 hdc in next st, hdc in next 3 sts, repeat from * around, join with sl st to first hdc. (60) sts
At this point your hat should measure a little over 5 1/2″ across. Check your measurements!
Round 6: (working between stitches) Ch 1, 2 sc in first st, sc in next 9 sts, *2 sc in next st, sc in next 9 sts; repeat from * around, join with sl st to first sc. (66) sts Round 7: Ch 1, exsc in each st around, join with sl st to first exsc. (66) sts Round 8: (working in BLO) Ch 1, sc in each st around, join with sl st to first sc. (66 blo sc) Rounds 9-17: Repeat Rounds 7-8.
At this point your hat should measure 7″ long. Now you get to decide if you want to add a ribbed band to finish the hat.
Hat Band
Round 1: Ch 1, sc in each st around, join with sl st to first sc. (66) sts Round 2: Ch 1, FPsc around first st, BPsc around next st, *FPsc around next st, BPsc around next st; repeat from * around, join with sl st to first FPsc. (66) sts Rounds 3-5: Ch 1, FPsc around first st, sc in next st, *FPsc around next st, sc in next st; repeat from * around, join with sl st to first FPsc. (66) sts Fasten off, and weave in ends.