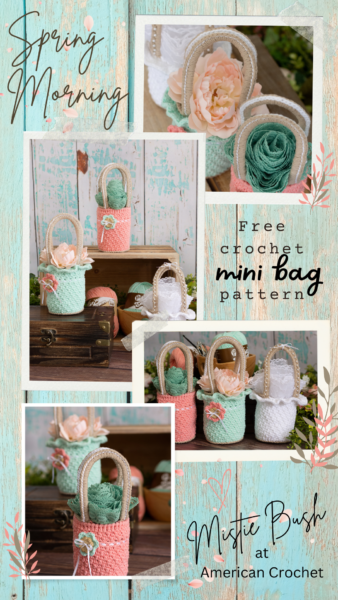
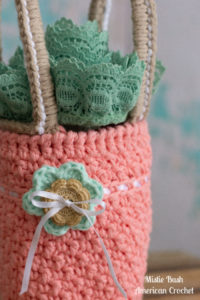
I enjoy creating adorable little bags for my nieces. Who says cute, simple and a hint of texture can’t be a timeless crochet piece? Well that is what my Spring Morning Mini Bag is all about. Oh, and maybe a little girly. 😉 Do you have a little girl or granddaughter who needs a new pretty bag for Spring, Easter or weddings that she may be attending?
Get the Pattern & Start Crocheting Today!
Sign up for my newsletter to receive updates on new patterns, exclusive discounts, and crochet tips! Click here to join!
I would love to see your projects in my Facebook Group and/or on Instagram!
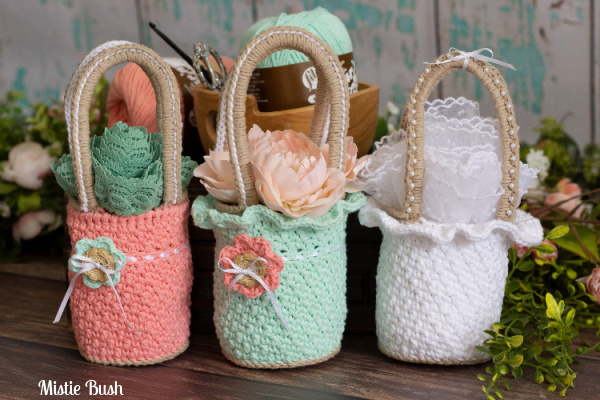
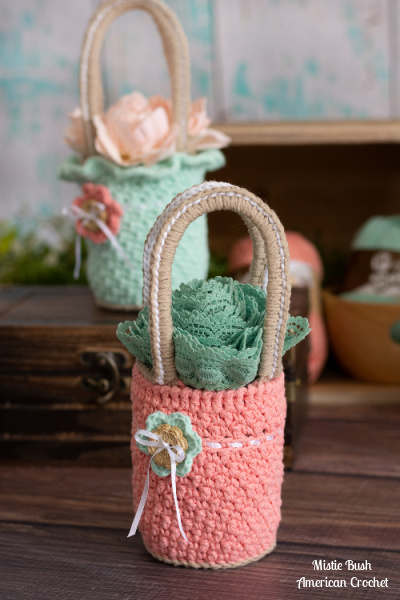
This precious Spring Morning Mini Bag comes in 2 different styles. You can dress it up with pearls and ruffles or keep it cute and simple. Customize it to fit your little girls style.
You can find more of my crochet bags over HERE
This bag will always be available to follow on my site. Enjoy!
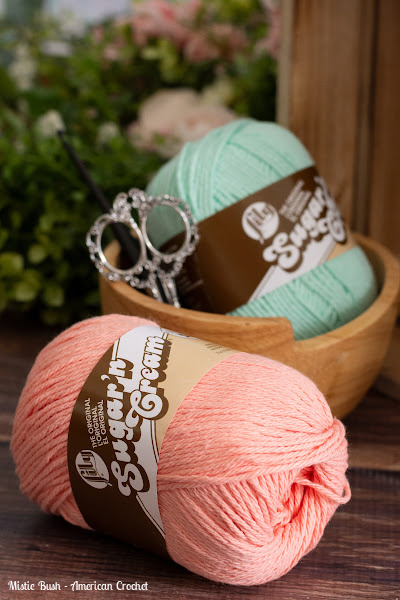
I enjoy using cotton yarn when making these mini bags. I find it to be sturdy, durable, easy to wash and they last for a long time.
Disclaimer: This post contains affiliate links. When you purchase something through these links I earn a small commission. You do not pay any extra for the item you purchase.
SPRING MORNING MINI BAG
REQUIREMENTS
Level of Difficulty
- Intermediate
Yarn
- 100 yards. #4 100% cotton Lily Sugar’n Cream in Jute (Color A) and Beach Glass (Color B)
Hook and Notions
- Size Hook: F/9 (3.75 mm), scissors, blunt needle, 1/8″ satin ribbon, button and stitch markers (optional)
Measurement
- 3 1/2 inches wide
- 3 (4) tall (without handle)
- 9″ tall including handle
Gauge
- 7 rounds (bottom of the bag) in 3 1/2″
Abbreviations
- Ch = chain
- Sc = single crochet
- Hdc = half double crochet
- Dc = double crochet
- Sl St = slip stitch
- BPsc = back post single crochet
- BLO = back loop only
- RSC = reverse single crochet
Pattern Notes
- Weigh your yarn cake: ________ grams
- Worked in the round
- 100 yards. I used #4 100% cotton Lily Sugar’n Cream in Jute and Beach Glass
- I also used a skinny sating ribbon, a flower button and a tiny craft glue dot to secure the bow in place.
- You may have to adjust your hook size depending on your tension. Rule of thumb always check your gauge.
- The bag measures 3 1/2” wide x 3 (4)” tall, depending on which one you make
- Chain 1 at beginning of round does not count unless otherwise stated.
- This bag is made in 2 different styles. Image is displaying each version.
Special Stitches
- Crab Stitch (Reverse Single Crochet): This stitch is distinctive; it looks ridged and makes a nice finishing option for crochet items. It looks great when worked as an edging using a contrasting or coordinating color.
- This is worked from left to right (or opposite direction)
- With Right Side of project facing you Ch 1, *insert hook into next st to right, yarn over and pull through, (2 loops on hook), yarn over and pull through both loops. * Continue working from * to * until you have reached the end of the project. Sl St into first ch 1 and fasten off. Weave in ends.
- Hdc in 3rd Loop = With the front of the stitch facing you, look at the top of the stitch, and find the sideways “V”. Next, bend the stitch to look at the back, and you should see another “V”. You’ll be working into the back loop of that “V”, this is called the 3rd loop. When working across, like you are in the square the 3rd loop should be facing you.
Queue & Favorite on Ravelry OR Purchase it on ETSY!
SPRING MORNING MINI BAG INSTRUCTIONS
Working with F hook and Color A
Round 1: Ch 1, 6 sc in magic circle, join with sl st. (6 sc) OR
Chain 2, work 6 sc in 2nd chain from hook; join with a slip stitch in 1st sc. (6 sc)
Round 2: Ch 1, 2 sc in each st around; join with sl st in 1st sc. (12 sc)
Round 3: Ch 1, 2 sc in same st as join, sc in next st, *2 sc in next st, sc in next st; repeat from * around, join with sl st in 1st sc. (18 sc)
Round 4: Ch 1, 2 sc in same st as join, sc in next 2 sts, * 2 sc in next st, sc in next 2 sts; repeat from * around, join with a sl st in 1st sc. (24 sc)
Round 5: Ch 1, 2 sc in same st as join, sc in next 3 sts, * 2 sc in next st, sc in next 3 sts; repeat from * around, join with a sl st in 1st sc. (30 sc)
Round 6: Ch 1, 2 sc in same st as join, sc in next 4 sts, * 2 sc in next st, sc in next 4 sts; repeat from * around, join with a sl st in 1st sc. (36 sc)
Round 7: Ch 1, 2 sc in same st as join, sc in next 5 sts, * 2 sc in next st, sc in next 5 sts; repeat from * around, join with a sl st in 1st sc. (42 sc)
Laying flat bottom of bag should measure approximately 3 ½ inches
Fasten off Color A and attach Color B
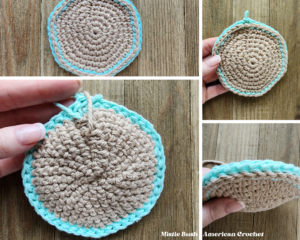
Round 8: Ch 1, BPsc in each st around, join with sl st in 1st BPsc (the post on the sc is tiny but you can still work around it. To work the post stitches, insert your hook right under both loops at the very top of the stitches). (42 BPsc)
Round 9: Ch 1, sc in same st as join, dc in next st, *sc in next st, dc in next st; repeat from * around, join with a sl st. (42 sts)
Round 10: Ch 1, dc in same st as join, sc in next st, *dc in next st, sc in next st; repeat from * around, join with a sl st. (42 sts)
Repeat Rounds 9 and 10 until your bag is:
3” tall (approximately 4 times) for a bag with ribbon
4” tall for plain-sided bag. 7 rounds = 2” of height
Move to finishing.
With Ribbon:
Round 1: Working in BLO, sc in each st around, join with sl st in 1st BLO sc. (42 BLO sc)
Now you will run the ribbon through the sc, once you have made it back around. Do not tie it together.
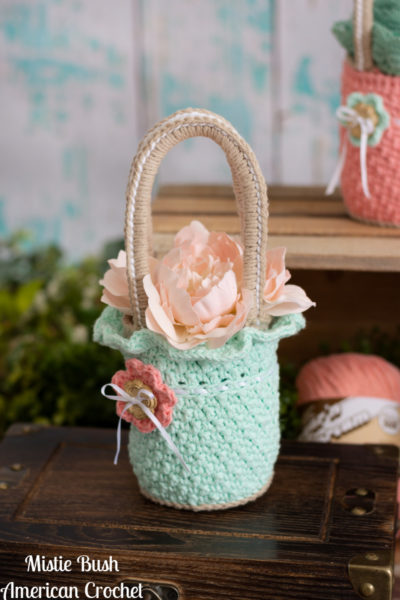
Rounds 2-3: Repeat Rounds 9 and 10.
Round 4: Ch 1, hdc in each st around, join with sl st in 1st hdc. (42 hdc)
Continue to Top Trim
Without Ribbon:
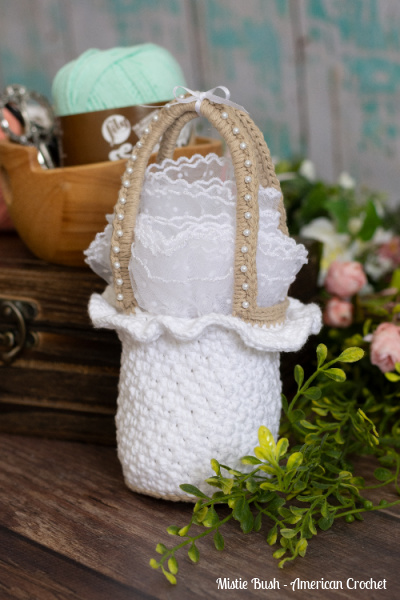
Round 1: Ch 1, hdc in each st around; join with a sl st in 1st hdc. (42 hdc)
Round 2: Ch 1, working in 3rd loop of hdc, sc in each st around, join with a sl st. (42 sts)
Continue to Top Trim
Plain Top Trim:
Round 1: Ch 1, hdc in each st around, join with a sl st in 1st hdc. (42 hdc)
Round 2: Ch 1, working in 3rd loop of hdc, sc in each st around, join with a sl st. (42 sts)
Round 3: RSC in each st around, join with a sl st.
Ruffle Top Trim:
Round 1: Ch 1, 2 dc in first st, 2 dc in next st, *2 dc in next st, 3 dc in next st; repeat from * around, join with a sl st in 1st dc.
Fasten Off and weave in ends. Now we begin the straps.
Bag Straps
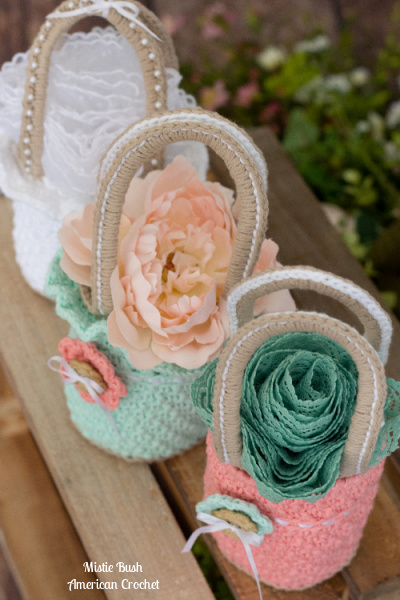
Working with Color B
Round 1: Sc in next 14 sts, ch 40, sk 7 sts, sc in next 14 sts, ch 40, sk 7 sts, jin with a sl st in 1st sc. (28 sc, 2 ch-40 sps)
Round 2: Sl St across next 14 sts, sc in next 40 chs, sl st across next 14 sts, sc in next 40 chs, join with a sl st.
Round 3: *Working in BLO, sl st in next 14 sts working around sc sts in ch-40 sps, sc evenly around the handle; repeat from * around.
Fasten Off and weave in ends.
Handle Trim: Using Color B, or contrasting color, sl st along handles.
Fasten Off and weave in ends. Now we make the flower.
Flower
Round 1: Ch 1,6 sc in magic circle, join with sl st. (6 sc) OR
Chain 2, work 6 sc in 2nd chain from hook; join with a slip stitch in 1st sc. (6 sc)
Round 2: Ch 1, 2 sc in each st around, join with a sl st in 1 st sc. (12 sc)
Round 3: *(hdc, 2dc, hdc), in same st, sl st in next st,* repeat from * around, join with a sl st in 1st hdc. (6 petals)
Fasten Off leaving a 10” tail for sewing flower onto bag.
Sew flower on to the bag below the handle. Now run the ribbon through the flower and button and tie into a bow. This is where the craft dot comes into play. I used it to secure the bow.
Don’t forget to share your projects in my Facebook Group and/or on Instagram!
>>> SIGN UP FOR THE AMERICAN CROCHET NEWSLETTER! <<<
Happy Hookin!
XO, Mistie
